
How To Make Sourdough Starter
Learn how to make a sourdough starter from scratch with just flour, water, and patience. Follow this simple step-by-step guide to create and maintain a bubbly, active sourdough starter for baking homemade sourdough bread!
Servings :
Calories : 255kcal
Ingredients
- 350 g whole wheat flour
- 350 g lukewarm water
Instructions
Day 1: Getting Started
- Mix 50g of flour with 50ml of water in a clean jar (use a large jar with at least a 16oz/500ml capacity).
- Stir well until no lumps remain.
- Place the lid loosely on the jar and let it sit at 77-86°F (25-30°C) for 24 hours. If possible, stir it briefly after 12 hours.
Day 2: First Feeding
- Not much will have happened yet, but it might smell a bit odd!
- Add another 50g of flour and 50ml of water, stir thoroughly, cover loosely, and leave it at room temperature for another 24 hours.
Day 3: Second Feeding
- By now, your starter should show some signs of life. You might see small bubbles on the surface, and it might smell stronger. → Mine doubled in volume within 24 hours but then collapsed again.
- Repeat the process from day 2: add 50g of flour and 50ml of water, stir, cover, and let sit for another 24 hours.
Day 4: Feeding in a New Jar
- You might notice some water forming on top of the starter — this is called “hooch” and it means your starter is hungry (which is a good sign)! 😊
- Stir the starter, including the hooch, and transfer 50g of it into a new, clean jar (a smaller 8 oz/250ml jar will do). Compost or discard the rest. Add 50g of flour and 50ml of water, stir, and cover loosely.
Days 5-7: Feeding & Observing
- Each day, repeat the process from day 4: take 50g of your starter, mix it with 50g of flour and 50ml of water in a clean jar, stir, cover, and leave it for 24 hours.
- By now, your starter should double in volume overnight and have plenty of bubbles. If it doesn’t, continue this routine for a few more days. Sometimes it just takes a little more time, especially if your home is cooler than 77°F (25°C). Don’t give up! 🙏
- To track the rise of your starter, wrap a rubber band around the jar after feeding. This makes it easy to see how much it has grown after 24 hours.
Day 8: Ready to Use
- Your starter is ready when it has roughly doubled in size, looks fluffy, and has a pleasant, slightly tangy smell. If not, repeat feeding for a few more days until it's active.
- Now you can use it to bake your first loaf of sourdough bread! Just remember to always save a bit of your starter to keep it going for future bakes.
Notes
- It’s best to use whole wheat flour because it has more nutrients, making it ideal for jump-starting the fermentation process.
- Patience is key! It might take a few extra days for your starter to get going, especially in cooler temperatures.
Recommended Products
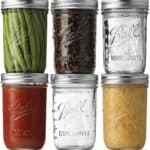
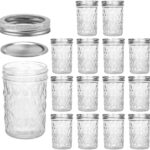

Nutrition
Calories: 255kcal | Carbohydrates: 54g | Protein: 10g | Fat: 2g | Saturated Fat: 0.3g | Polyunsaturated Fat: 1g | Monounsaturated Fat: 0.2g | Sodium: 5mg | Potassium: 272mg | Fiber: 8g | Sugar: 0.3g | Vitamin A: 7IU | Calcium: 28mg | Iron: 3mg
