
Sourdough Bread
This Sourdough Bread beginner’s guide will walk you through every step, from creating a starter to baking the perfect loaf, with plenty of tips and tricks along the way!
Servings : Slices
Calories : 182kcal
Ingredients
Sourdough
- 20 g sourdough starter
- 100 ml lukewarm water
- 50 g bread flour, or manitoba flour
- 50 g whole wheat flour
Main-Dough
- 330 g lukewarm water
- 450 g bread flour, or manitoba flour
- 50 g whole wheat flour
- 10 g salt
Instructions
SOURDOUGH LEVAIN
- Mix 20g of active starter and 100ml lukewarm water in a bowl with a spoon. Stir in 50g white flour and 50g whole wheat flour, cover with a clean kitchen towel, and let rest at room temperature overnight.
AUTOLYSE
- Add 330ml lukewarm water, 450g white flour, and 50g whole wheat flour to the sourdough in the bowl. Mix with a spoon, then cover and let rest at room temperature for 45 minutes.
KNEADING
- Add the salt, and knead, stretch, and fold the dough by hand for 5 minutes.
BULK FERMENTATION
- Transfer the dough to a clear container (about 2 liters), and fold the dough every 30 minutes for the next 3 ½ hours. Here’s how: with a wet hand, gently pull a part of the dough up and fold it into the center. Repeat this on all four sides (left, right, top, bottom). → During bulk fermentation, a strong dough structure will develop.
- The dough should increase in volume by about 20-30%. You’ll notice this best in a clear container (mark the initial dough height with a piece of tape before bulk fermentation).If the dough hasn’t gained enough volume yet, you can let it rest at room temperature for another 2-3 hours (without folding). → The timing may vary depending on how active your sourdough starter is and the room temperature.
SHAPING
- Place the dough on a lightly floured work surface using a dough scraper. Fold the dough over itself so the floured side is on the outside. Now, using a lightly floured hand and the bench scraper, shape the dough into a round ball and let it rest for 20-30 minutes.
- Lightly flour the surface of the dough, then flip it over so the floured side is down. Pull the third of the dough closest to you up and fold it over the middle third. Repeat with the right, left, and top thirds. Finally, pick up the dough and fold it over itself so the smooth side is on top.
- Gently cup your hands around the dough and drag it towards you across the unfloured surface 2-3 times until a smooth, round ball forms.
PROOFING
- Generously dust a 9-inch proofing basket with flour (a small sieve works great for this). Place the dough ball smooth side down into the basket. Cover with a clean kitchen towel and let it rest for 3 hours. → If you choose option 2, place the basket in a plastic bag, seal it, and let the loaf proof in the fridge for 8-12 hours. Check the blog post for more details.
SCORING & BAKING
- Preheat the oven along with a Dutch oven to 500°F (260°C) for 30 minutes.
- Turn the bread out onto a piece of parchment paper (tip: place the parchment paper on a cutting board and flip it over the proofing basket for an easy transfer). Score the top with a sharp bread lame in a simple square pattern. → For a raised crust like in the pictures, score the bread at a shallow angle.
- Carefully remove the hot Dutch oven from the oven (caution: it’s very hot!). Place the bread with the parchment paper inside the Dutch oven, close the lid, and bake at 450°F (230°C) for 20 minutes.
- Remove the lid and bake for another 25 minutes at 450°F (230°C).
- Let the bread cool completely on a wire rack before slicing (2-3 hours). → If you can’t wait, you can slice it sooner!
Notes
- Bread Flour: It's important to use bread flour as this has a higher protein percentage than all-purpose flour. Alternatively, you can use Manitoba Flour (Type 0) or Pizza Flour (Type 00). If you only have regular white flour, reduce the water to 310-320ml.
- Store: Wrapped in a kitchen towel, the bread will stay fresh for 2-3 days.
- Freeze: I always freeze half of the bread right after it has completely cooled. I slice it beforehand and pack the single slices in a freezer bag. Thaw single slices directly in the toaster when ready to eat. This way, you’ll always have fresh bread at home, and there’s hardly any waste.
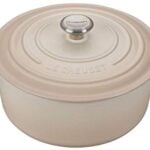
Recommended Products


Nutrition
Calories: 182kcal | Carbohydrates: 38g | Protein: 5g | Fat: 1g | Saturated Fat: 0.1g | Polyunsaturated Fat: 0.3g | Monounsaturated Fat: 0.1g | Sodium: 326mg | Potassium: 75mg | Fiber: 2g | Sugar: 0.1g | Vitamin A: 1IU | Calcium: 10mg | Iron: 2mg
