*This post may contain affiliate links. Thank you for your support.
This no-knead olive bread is incredibly delicious, filled with the flavors of olives, a crispy crust, and a light, airy interior. And all that without kneading!
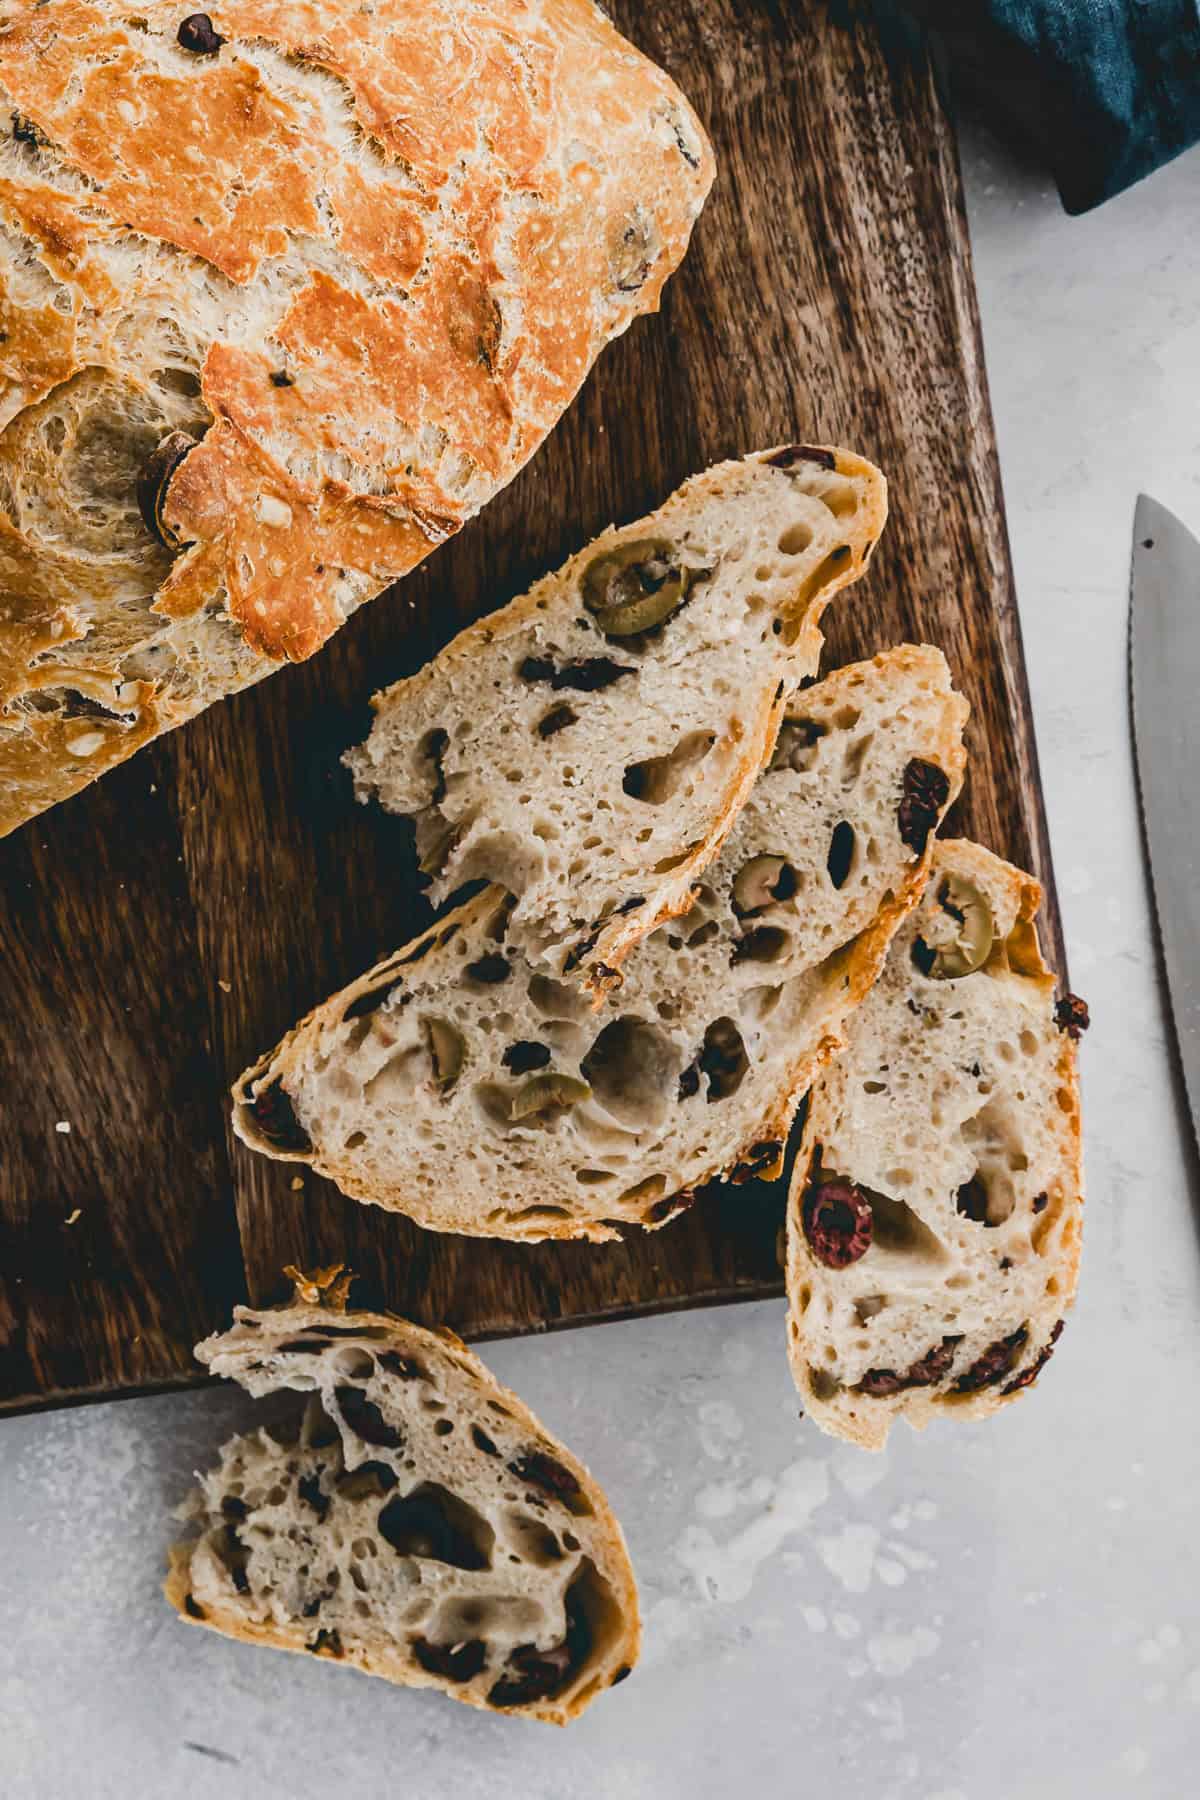
If there’s one bread that can truly transport you to the sun-drenched shores of the Mediterranean with just a single bite, it’s this incredibly delicious No-Knead Olive Bread. Packed with the rich flavors of olives, featuring a crispy crust and a light, airy interior, this bread is a testament to the beauty of simplicity in baking.
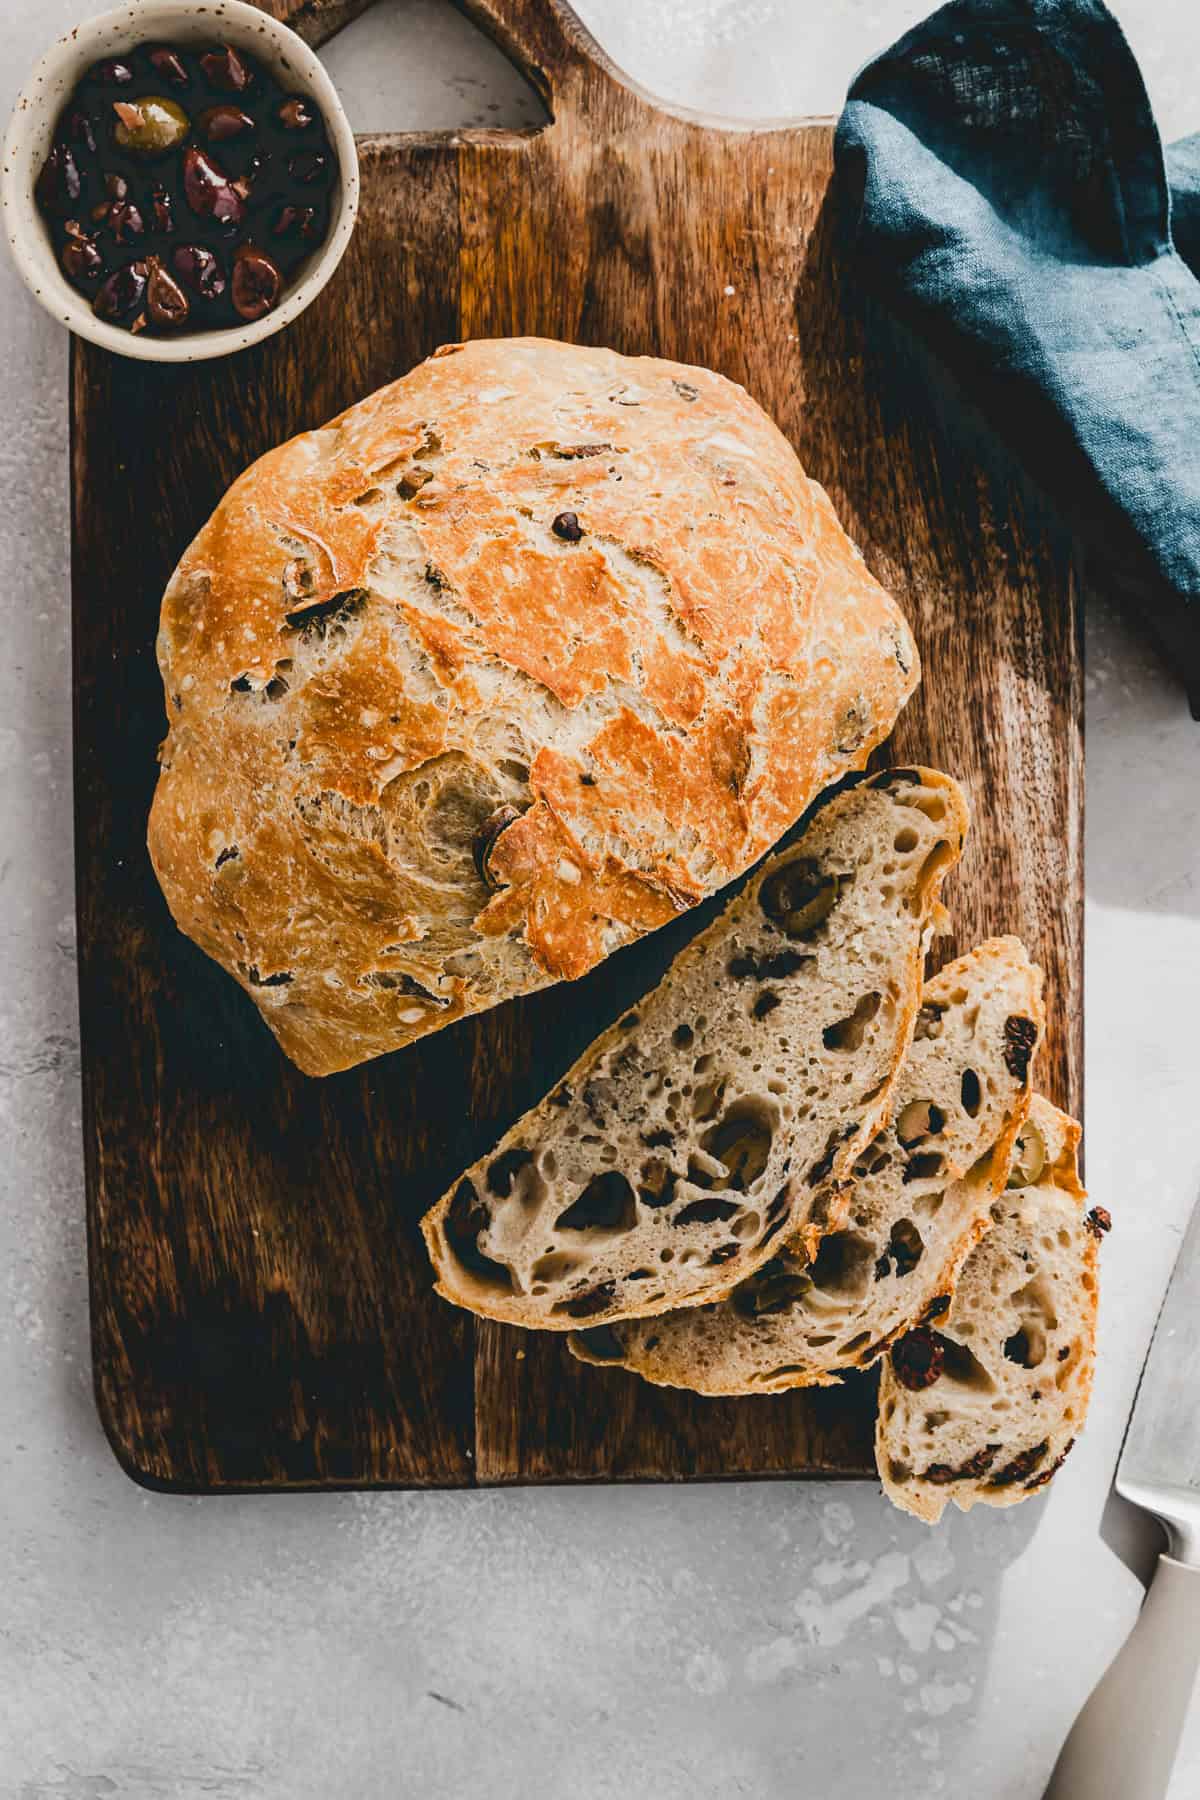
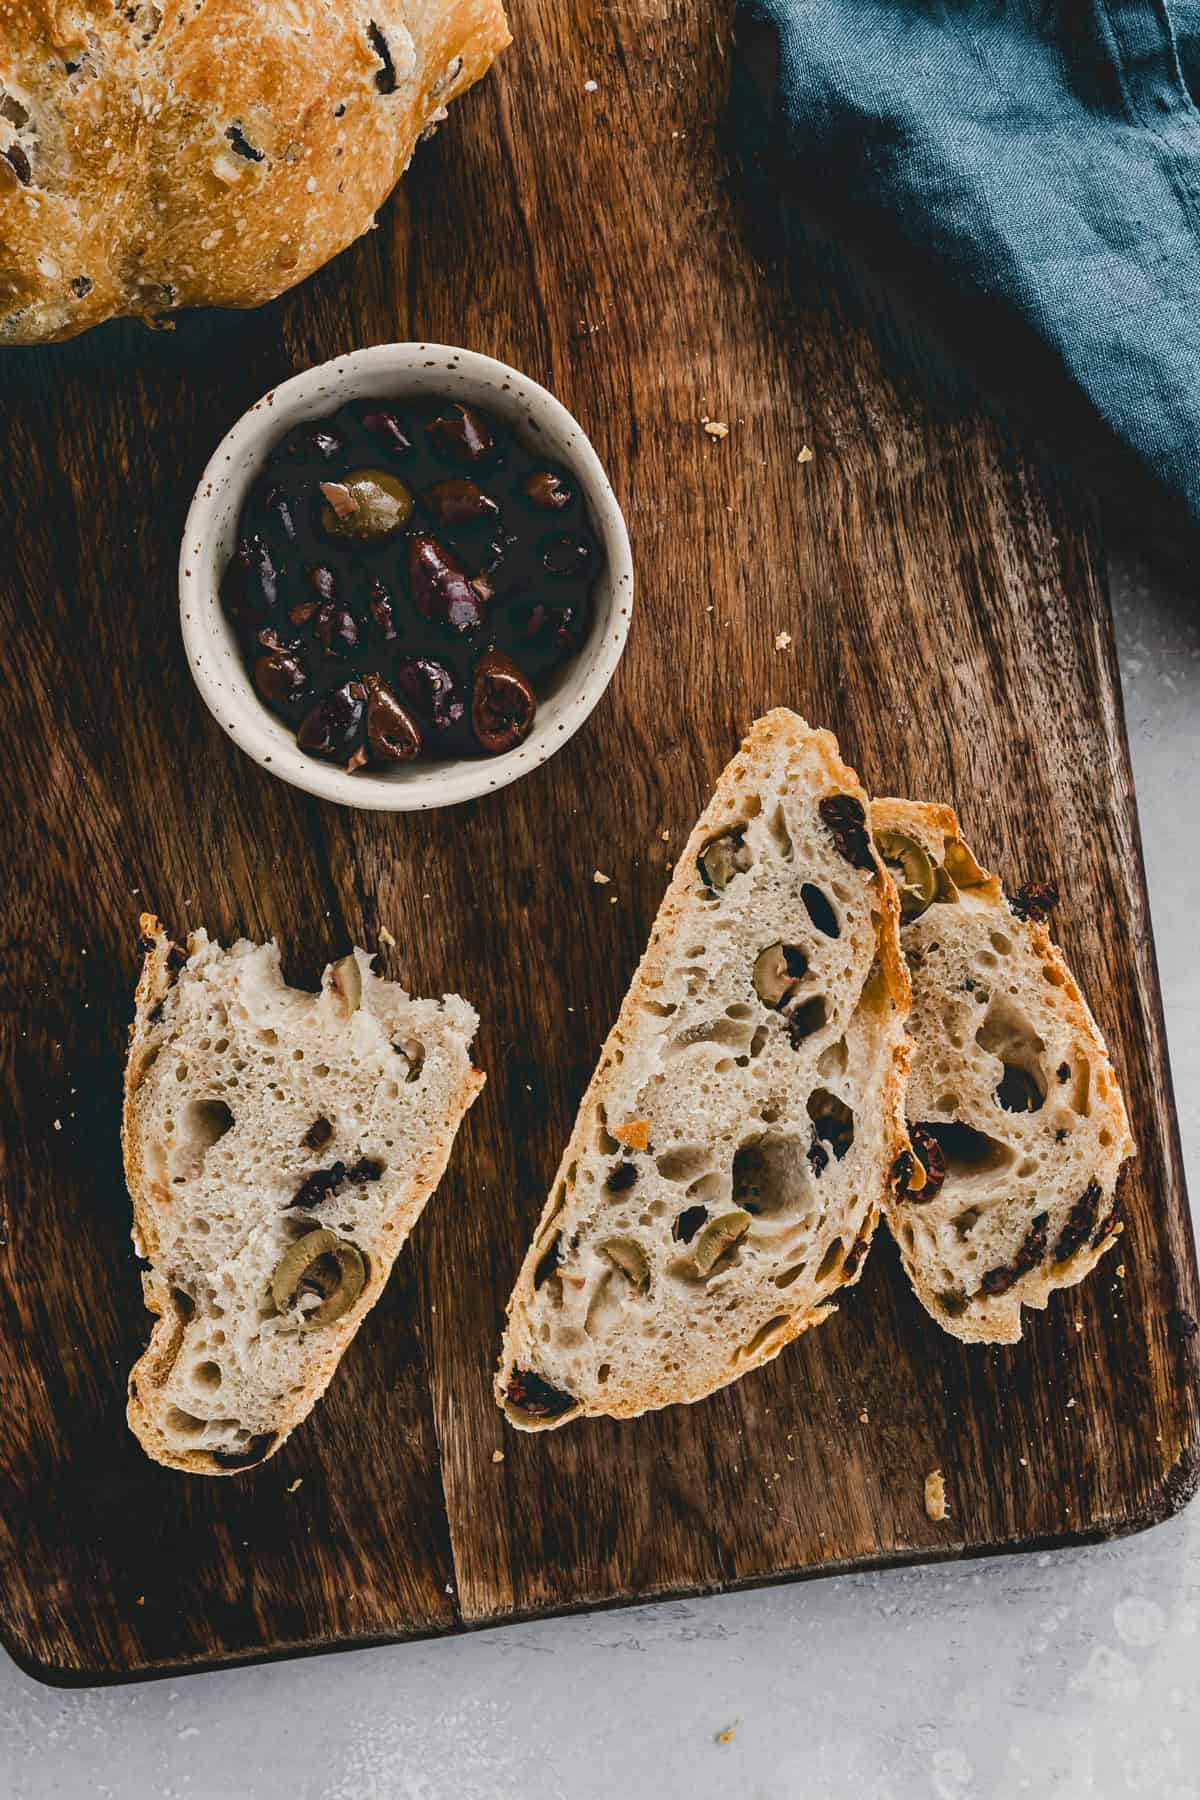
The olives infuse the bread with a wonderful aroma and a hint of saltiness, making it a hit among olive aficionados. It’s versatile enough to be served as an appetizer, a side dish, for grilling, dipping, or even as sandwich bread.
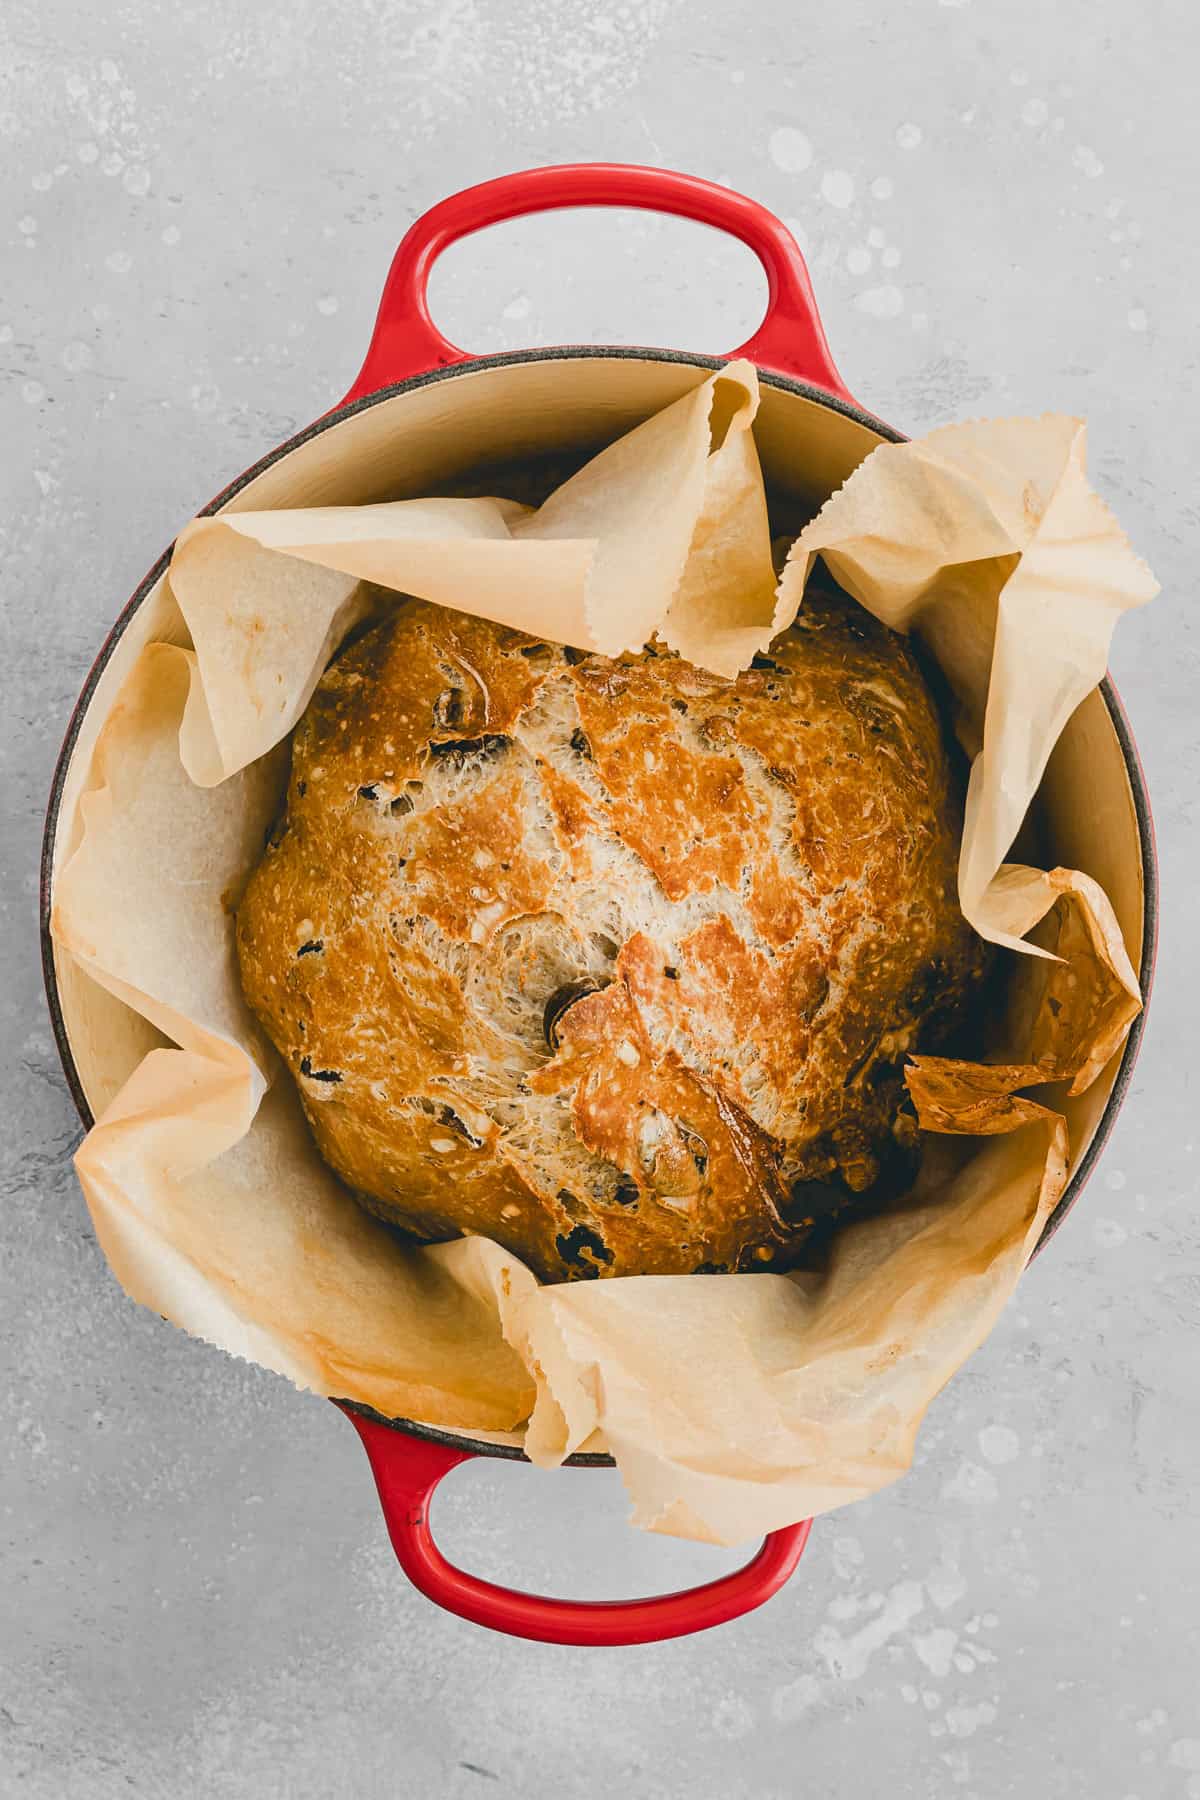
If the taste alone doesn’t win you over, the method of preparation surely will. This bread is made without kneading, meaning minimal effort on your part, but with results that will amaze you. Imagine a moist, flavorful inside, light dough, and an extra-crispy crust, all thanks to baking the olive-laden dough in a cast iron pot.
No tiresome kneading, no constant checking – just a few simple steps and a little patience. The dough needs to rise overnight. Anything between 12 to 18 hours is perfect, allowing you to easily fit baking into your day.
Whether you’re a baking novice or an experienced baker, this Olive Bread recipe is perfect for anyone who loves the taste and joy of bread baking but doesn’t have the time or inclination to deal with complicated techniques.
Ingredients
See recipe card for quantities.
- Olives – The star of our recipe. Olives not only add color to our bread but also bring a touch of Mediterranean flair. I recommend a mix of green and Kalamata olives! Feel free to use your favorite olives, just make sure they’re pitted!
- Bread Flour & Spelt Flour – This mix ensures a flavorful bread. You can also use just bread flour, all-purpose flour, or even whole wheat flour.
- Instant Yeast – The easiest way to ensure success, and you probably already have a packet in your pantry.
- Salt & Water – The water should be lukewarm to activate the yeast.
- Optional: If you love herbs, add some chopped fresh thyme and rosemary!

Visual Step-by-Step Instructions
This visual step-by-step instruction will help you along the way – definitely recommended if you’re a baking beginner!
- Early Evening: In a large bowl, mix flour, salt, and instant yeast. Add warm water and mix well with a wooden spoon/spatula – no kneading required!
- Fold in chopped olives, cover the bowl with plastic wrap, and let it sit at room temperature for 12-18 hours.
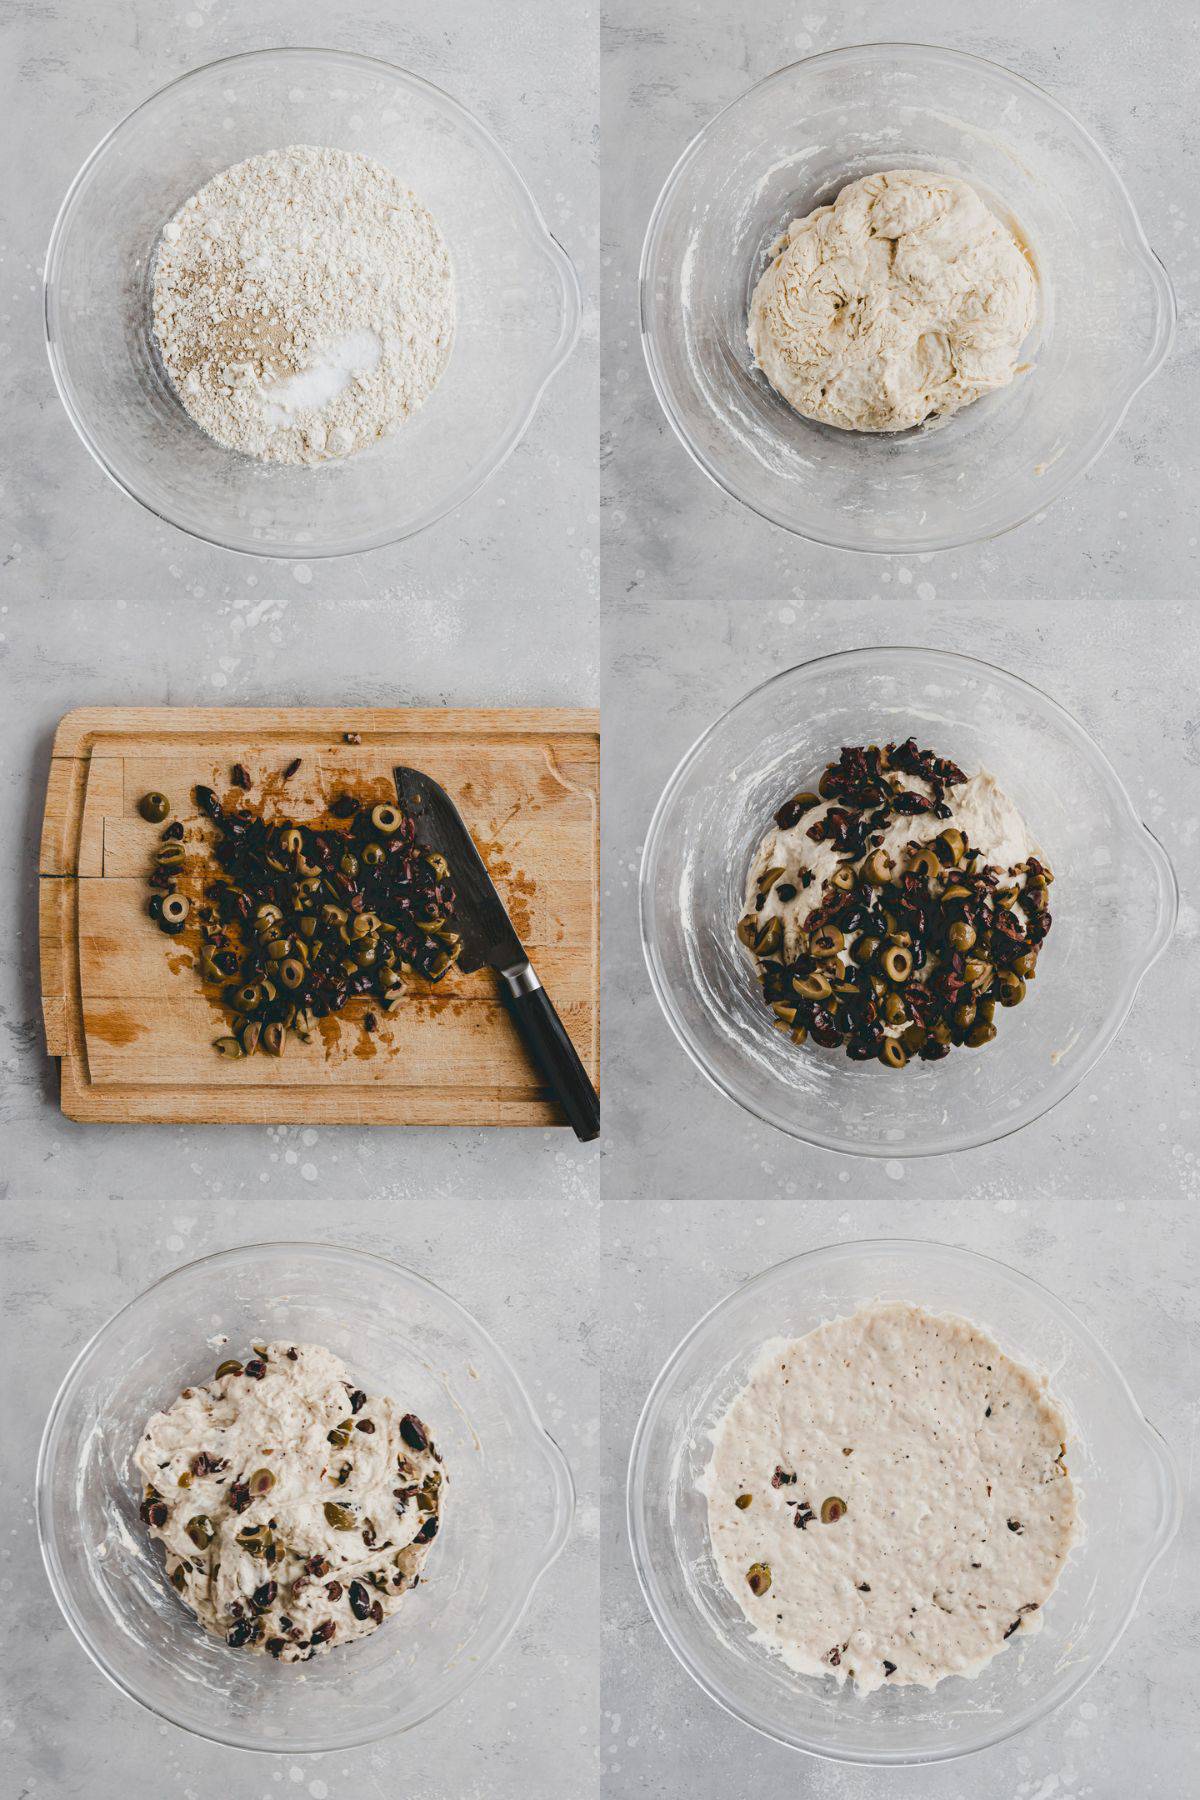
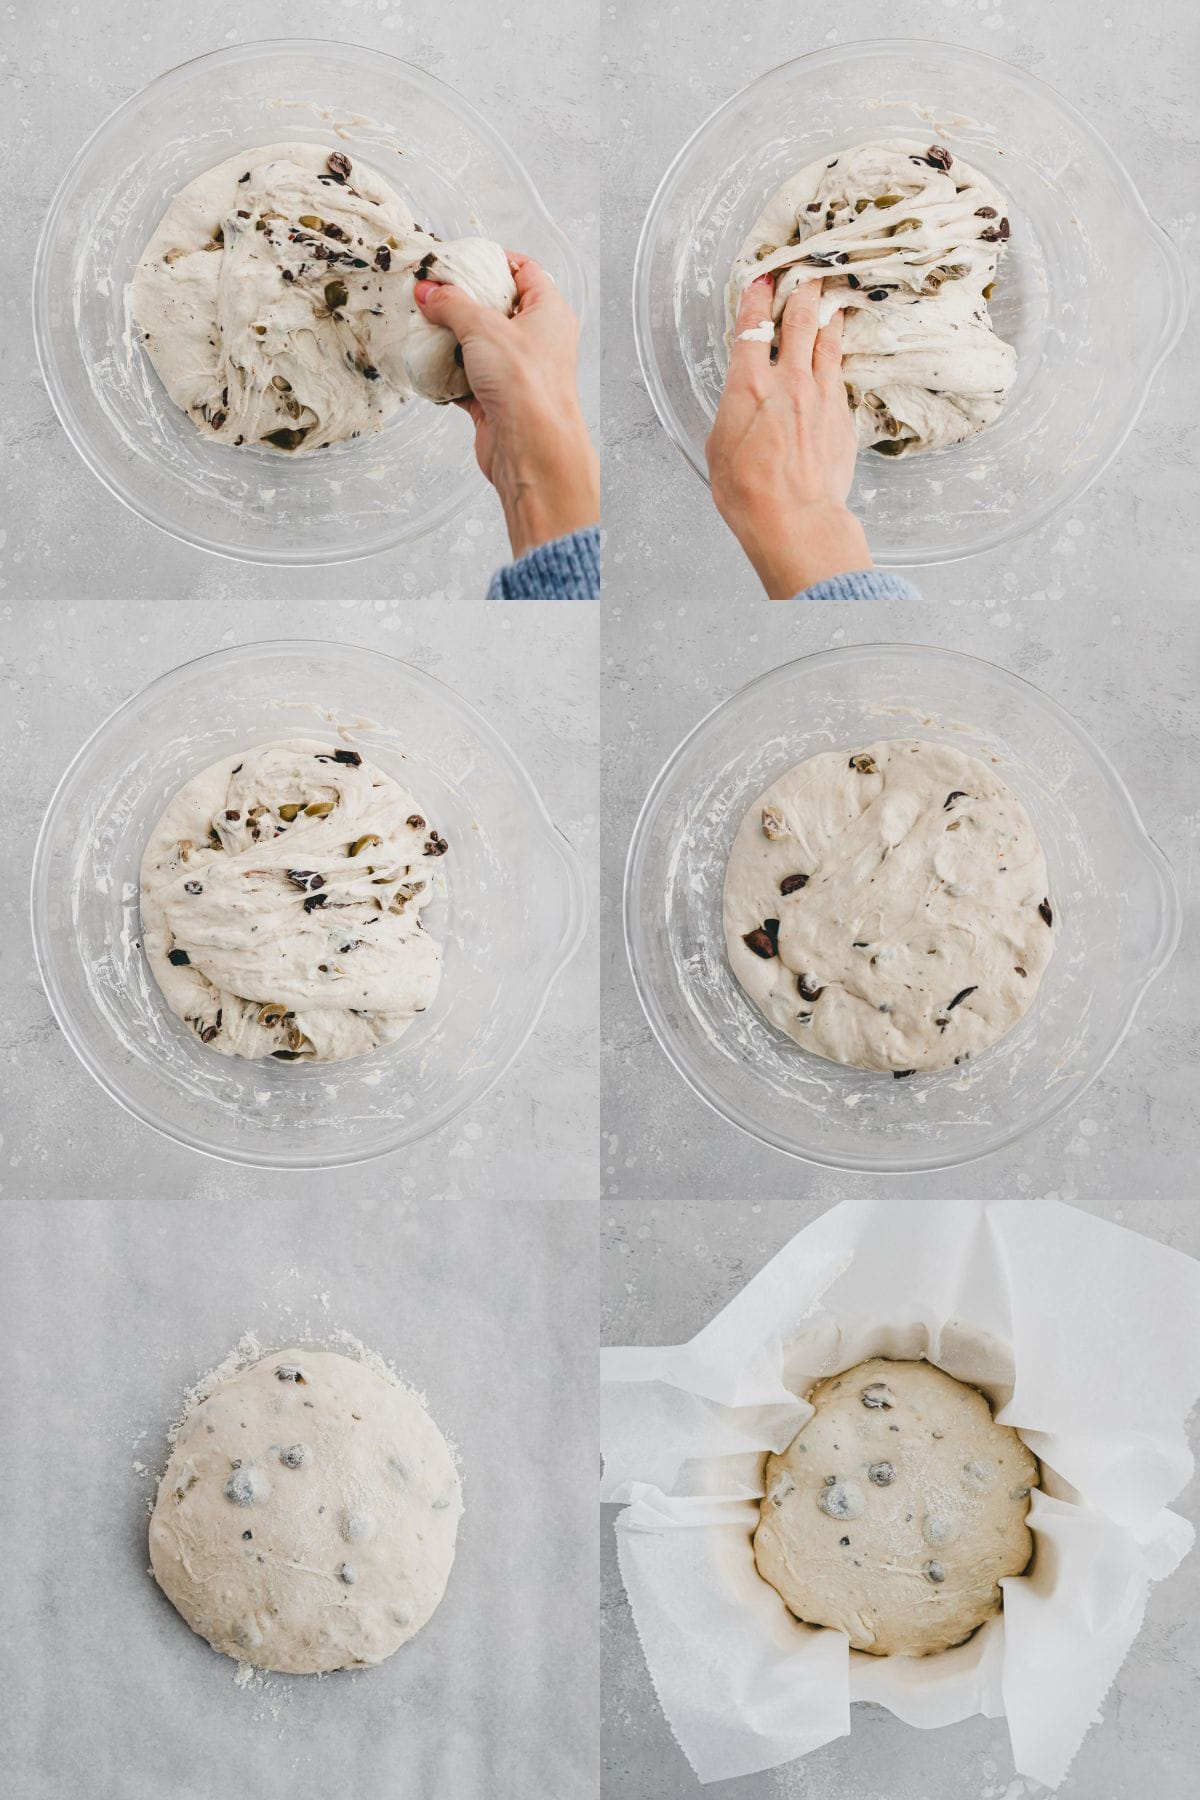
- Next Morning: Fold the very wet dough directly in the bowl with a wet hand. Here’s how: Grab a portion of the dough with a wet hand, pull gently, and then fold it into the center. Do this once on all four sides (left, right, top, bottom).
- Let the dough rest covered with the plastic wrap for another 30 minutes.
- Repeat the folding and resting process twice (the dough will be folded 3 times in total, with a total resting time of 1 hour and 30 minutes).
- While the final rest is happening, preheat the oven along with a Dutch oven to 450°F (230°C).
- Shape: Turn the dough onto a well-floured surface, dust it with a bit more flour, fold again (this time with lightly floured hands), then shape it into a ball. Place it seam-side down on parchment paper.
- Bake: Take the hot Dutch oven out of the oven (be careful, it’s hot!), place the dough with the parchment paper inside the dutch oven, cover with the lid, and bake for 30 minutes.
- Remove the lid and bake for another 30 minutes until the bread is golden brown and crispy.

- Let the olive bread cool completely on a wire rack before slicing.

The dough is very wet, which makes the bread aromatic, airy, and moist. For beginners, this dough may be a bit tricky to handle. In this case, you can mix the dough with only 1 ¼ cup (300ml) of water to make it slightly easier to work with.
Storage & Freezing Instructions
- Store: Wrapped in a kitchen towel, the bread will stay fresh for 2-3 days.
- Freeze: Slice the bread, place in a freezer bag, and freeze for up to 3 months. Thaw single slices directly in the toaster when ready to eat.
More No-Knead Bread Recipes
If you make this recipe, I’d love for you to give it a star rating ★ below.
Please follow me on Instagram, Pinterest, and Facebook or sign up for my free newsletter to never miss the newest recipes. I would be thrilled to welcome you to my community & thank you so much for your support!
📖 Recipe
Olive Bread – No Knead
Click on the stars to leave a vote!
Ingredients
- 1 ⅔ cup bread flour
- 1 ⅔ cup spelt flour or bread flour
- 1 ½ tsp salt
- 1 tsp instant yeast
- 1 ⅓ cup lukewarm water
- 1 cup mixed kalamata & green olives pitted and roughly chopped
Instructions
- Early Evening: In a large bowl, mix flour, salt, and instant yeast. Add water and mix well with a cooking spoon/spatula – no kneading required!
- Fold in chopped olives, cover the bowl with plastic wrap, and let it sit at room temperature for 12-18 hours.
- Next Morning: Fold the very wet dough directly in the bowl with a wet hand. Here's how: Grab a portion of the dough with a wet hand, pull gently, and then fold it into the center. Do this once on all four sides (left, right, top, bottom).
- Let the dough rest covered with the plastic wrap for another 30 minutes.
- Repeat the folding and resting process twice (the dough will be folded 3 times in total, with a total resting time of 1 hour and 30 minutes).
- While the final rest is happening, preheat the oven along with a Dutch oven to 450°F (230°C).
- Shape: Turn the dough onto a well-floured surface, dust it with a bit more flour, fold again (this time with lightly floured hands), then shape it into a ball. Place it seam-side down on parchment paper.
- Bake: Take the hot Dutch oven out of the oven (be careful, it's hot!), place the dough with the parchment paper inside the dutch oven, cover with the lid, and bake for 30 minutes.
- Remove the lid and bake for another 30 minutes until the bread is golden brown and crispy.
- Let the olive bread cool completely on a wire rack before slicing.
Notes
- The dough is very wet, which makes the bread aromatic, airy, and moist. For beginners, this dough may be a bit tricky to handle. In this case, you can mix the dough with only 1 ¼ cup (300ml) of water to make it slightly easier to work with.
- Resting Time: The dough should rest anywhere from 12-18 hours, allowing you to flexibly schedule your baking time into your day.
- Dutch Oven: Baking in a Dutch oven helps make the bread super crispy. If you don’t have a Dutch oven, you can use a round glass baking dish with a lid. As a last resort, baking on a baking sheet is possible, though the bread won’t be quite as crispy.
- Storage: Wrapped in a kitchen towel, the bread will stay fresh for 2-3 days.
- Freeze: For freezing, slice the bread and place the slices in a freezer bag. It can be stored for up to 3 months. Thaw single slices directly in the toaster when ready to eat.

